新增網站頁面 創建一個分類 categories 頁面 1 hexo new page categories
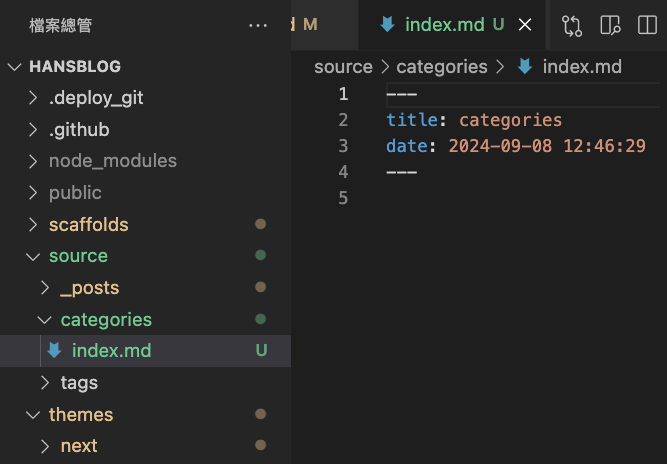
source 裡會多一個 categories 資料夾,裡面會有 index.md 檔。
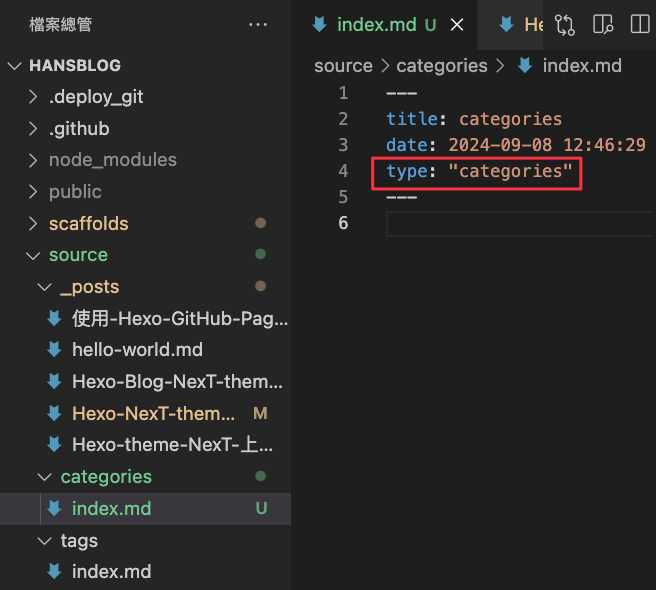
新增 index.md 中 Front-matter 參數 type: “categories”,設置對應的 type 參數,才會對應類別的文章。
source/categories/index.md 1 2 3 4 5 --- title: categories date: 2024-09-08 12:46:29 type: "categories" ---
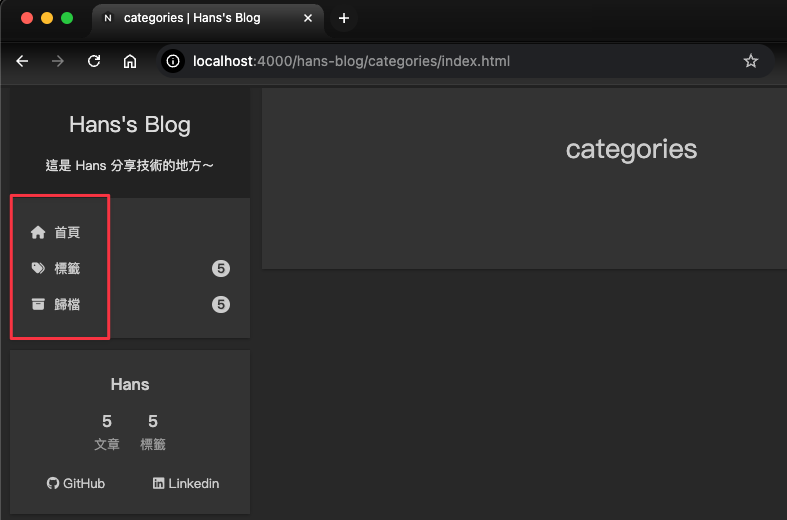
輸入網址路徑:http://localhost:4000/hans-blog/categories/index.html
categories頁面存在,但此時個人網站上還沒出現 categories 選單(紅框處)。
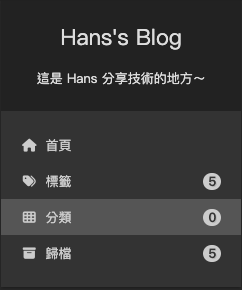
NexT 設定檔設定 打開主題設定檔 config.yml,找到以下程式碼,把 categories 前方的註解 # 刪除。
themes/next/_config.yml 1 2 3 4 5 6 7 8 9 10 menu: home: / || fa fa-home #about: /about/ || fa fa-user tags: /tags/ || fa fa-tags - #categories: /categories/ || fa fa-th + categories: /categories/ || fa fa-th archives: /archives/ || fa fa-archive #schedule: /schedule/ || fa fa-calendar #sitemap: /sitemap.xml || fa fa-sitemap #commonweal: /404/ || fa fa-heartbeat
categories 多分類用法 1 2 3 categories: - [Hexo, NexT]- [Hexo, GitHub]
NexT 和 GitHub 都是 Hexo 的子分類
修改樣式 程式碼 inline 樣式
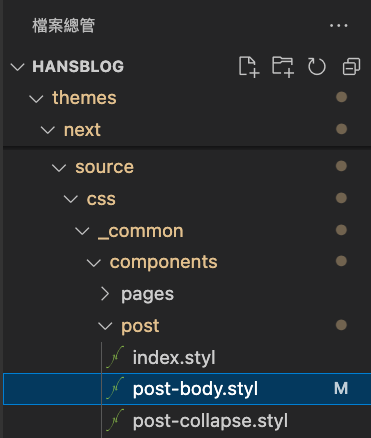
在 themes/next/source/css/_common/components/post 找到 post-body.styl 檔案。
在 post-body.styl 檔案中的 .post-body 內新增
1 2 3 4 5 code { background-color : #f7e3e3 ; color : #990000 }
參考文章:修改HEXO博客Next主题的文章显示样式 | thatmee’s blog
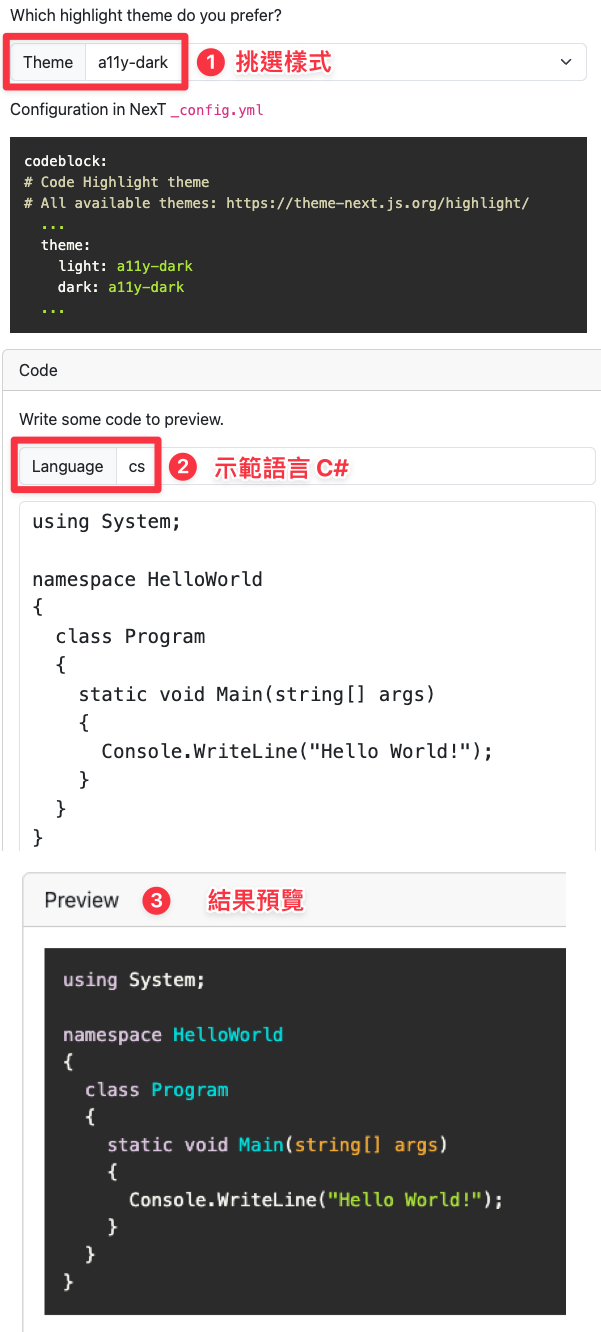
程式碼區塊樣式 Step1:挑選樣式 到 NexT Highlight Theme Preview 試選喜歡的樣式
選擇 Highlight.js
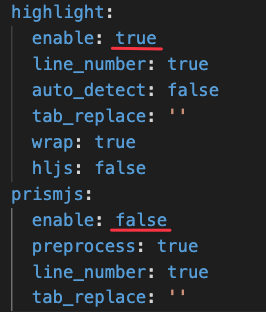
Step2:設定 hexo/_config.yml 參數 1 2 3 4 5 6 highlight: enable: true ... prismjs: enable: false ...
設定完成後執行:hexo clean
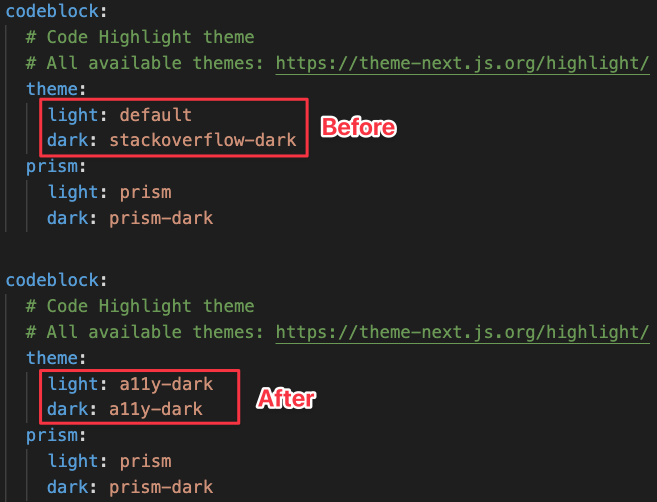
Step3:設定 next/_config.yml 1.設定高亮主題
測試結果:
1 2 3 4 5 6 7 8 9 10 11 12 using System;namespace HelloWorld { class Program { static void Main (string [] args { Console.WriteLine("Hello World!" ); } } }
1 2 3 4 copy_button: enable: true style:
效果:
在 themes/next/source/css/_common/components/post 找到 post-body.styl 檔案。
在 post-body.styl 檔案中的 .post-body 內新增:
themes/next/source/css/_common/components/post/post-body.styl 1 2 3 4 5 6 7 8 9 10 11 .keybs { border : 1px solid gray; font-size : 1em ; box-shadow : 1px 0 1px 0 #eee , 0 2px 0 2px #ccc , 0 2px 0 3px #444 ; -webkit-border-radius : 3px ; -moz-border-radius : 3px ; border-radius : 3px ; margin : 2px 3px ; padding : 1px 5px ; white-space : nowrap; }
標籤外掛 Tag Plugins 參考文件:
Tag Plugins | NexT 標籤外掛(Tag Plugins) | Hexo Hexo 主題 NexT 設置 (一) | KentDoIt
Code Block 範例:指定程式語言為 lang:diff,每行行首使用 + 和 - 來控製程式碼增減。
1 2 3 4 {% codeblock 程式碼區塊測試 diff lang:diff line_number:true %} - code snippet deleted + code snippet added {% endcodeblock %}
效果:
程式碼區塊測試 diff 1 2 - code snippet deleted + code snippet added
範例:指定程式語言為 lang:C#,從第 3 行開始 first_line:3。
1 2 3 4 5 6 7 8 9 10 11 12 13 14 {% codeblock 程式碼區塊測試 C# lang:cs line_number:true first_line:3 %} using System; namespace HelloWorld { class Program { static void Main(string[] args) { Console.WriteLine("Hello World!"); } } } {% endcodeblock %}
效果:
程式碼區塊測試 C# 3 4 5 6 7 8 9 10 11 12 13 14 using System;namespace HelloWorld { class Program { static void Main (string [] args { Console.WriteLine("Hello World!" ); } } }
Note tag (bootstrap callout) 設定及用法可參考 Settings
到 NexT config file 設定
themes/next/_config.yml NexT config file 1 2 3 4 5 6 7 8 9 10 # Note tag (bootstrap callout) note: # Note tag style values: # - simple bootstrap callout old alert style. Default. # - modern bootstrap callout new (v2-v3) alert style. # - flat flat callout style with background, like on Mozilla or StackOverflow. # - disabled disable all CSS styles import of note tag. style: simple - icons: flase + icons: true # 顯示圖標
用法:
1 2 3 {% note [class] [no-icon] [summary] %} Any content (support inline tags too). {% endnote %}
效果:
1 2 3 4 {% note success %} #### Success Header **Welcome** to [Hexo! ](https://hexo.io ){% endnote %}
1
2
3
4
{% note success This is a summary %} #### Success Header **Welcome** to [Hexo! ](https://hexo.io ){% endnote %}
This is a summary
Welcome to Hexo!
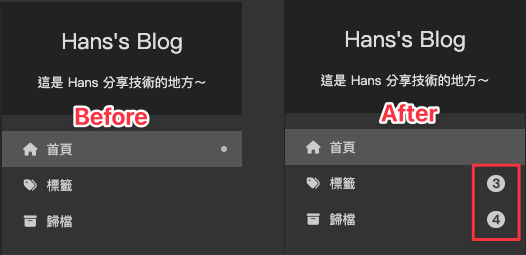
themes/next/_config.yml 1 2 3 4 5 # Enable / Disable menu icons / item badges. menu_settings: icons: true - badges: false + badges: true
居中引用 用法:
1 2 3 4 {% centerquote %}這是 Hans 的 Blog{% endcenterquote %} // 簡寫 {% cq %}這是 Hans 分享技術的地方~{% endcq %}
效果:
這是 Hans 的 Blog
這是 Hans 分享技術的地方~
標註 Label 用法:
1 {% label [class]@text %}
[class] : default | primary | success | info | warning | danger
範例:
{% label @ipsum %}ipsum {% label primary@dolor sit %}dolor sit {% label success@adipiscing elit, %}adipiscing elit, {% label info@do eiusmod %}do eiusmod *{% label warning @ad %}* ad **{% label danger@nostrud %}** nostrud ~~{% label default @velit %}~~ velit <mark>esse</mark> esse
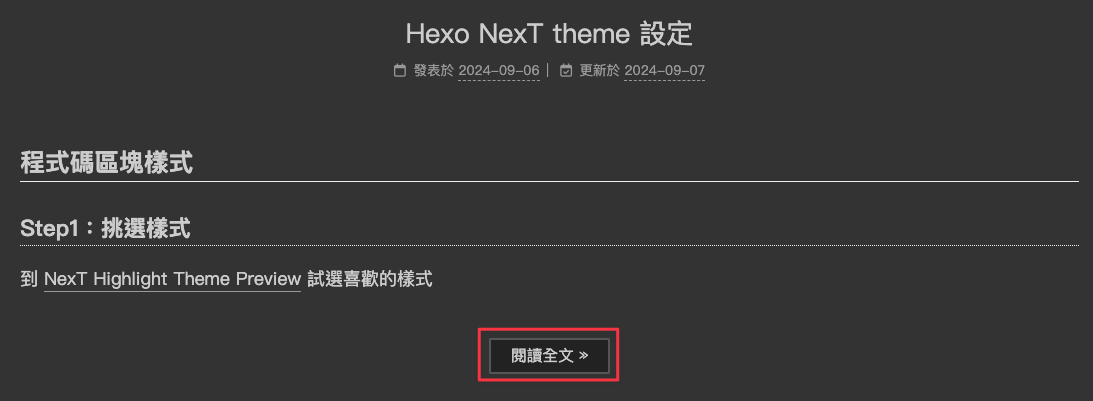
閱讀全文 More 在想截斷的地方輸入 <!--more--> 就可以截斷
用法:
效果:
可到 Font Awesome 挑選 icon。
用法:
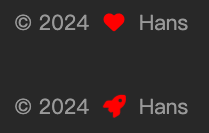
themes/next/_config.yml 1 2 3 4 5 6 7 8 9 10 11 12 13 14 footer: # Specify the year when the site was setup. If not defined, current year will be used. #since: 2021 # Icon between year and copyright info. icon: # Icon name in Font Awesome. See: https://fontawesome.com/icons - name: fa fa-heart + name: fa-solid fa-rocket # If you want to animate the icon, set it to true. - animated: false + animated: true # Change the color of icon, using Hex Code. color: "#ff0000"
效果:
更換成火箭 icon
開啟 animated 動畫效果
不蒜子 busuanzi_count 閱覽人數、閱讀次數 用法:
themes/next/_config.yml 1 2 3 4 5 6 7 8 9 10 11 # Show Views / Visitors of the website / page with busuanzi. # For more information: http://ibruce.info/2015/04/04/busuanzi/ busuanzi_count: - enable: false + enable: true total_visitors: true total_visitors_icon: fa fa-user total_views: true total_views_icon: fa fa-eye post_views: true post_views_icon: far fa-eye
效果:
閱覽人數
閱讀次數
版權宣告 版權頁設定,可以設定文末或 sidebar 的型態,選用 by-nc-sa ( 姓名標示-非商業性-相同方式分享 )。
themes/next/_config.yml 1 2 3 4 5 6 7 8 9 10 11 12 13 # Creative Commons 4.0 International License. # See: https://creativecommons.org/about/cclicenses/ creative_commons: # Available values: by | by-nc | by-nc-nd | by-nc-sa | by-nd | by-sa | cc-zero license: by-nc-sa # Available values: big | small size: small sidebar: false - post: false + post: true # You can set a language value if you prefer a translated version of CC license, e.g. deed.zh # CC licenses are available in 39 languages, you can find the specific and correct abbreviation you need on https://creativecommons.org + language: deed.zh_TW
Hexo-NexT 留言板 Utterances 設定 捨棄 Disqus 的理由:如何在hugo上安裝utterances?
把個人網站的評論跟 Github issues 討論區的功能結合在一起,別人只要來個人網站上留下評論,實際上就是在 Github repository 裡面開啟一個 issue,就可以在 issue 裡面看到所有的評論紀錄。
NexT 主題 config 設定 themes/next/_config.yml 1 2 3 4 5 6 7 8 9 10 11 12 # Utterances # For more information: https://utteranc.es utterances: - enable: false + enable: true - repo: user-name/repo-name # Github repository owner and name + repo: hans0825/hans-blog # Github repository owner and name # Available values: pathname | url | title | og:title issue_term: pathname # Available values: github-light | github-dark | preferred-color-scheme | github-dark-orange | icy-dark | dark-blue | photon-dark | boxy-light - theme: github-light + theme: github-dark-orange
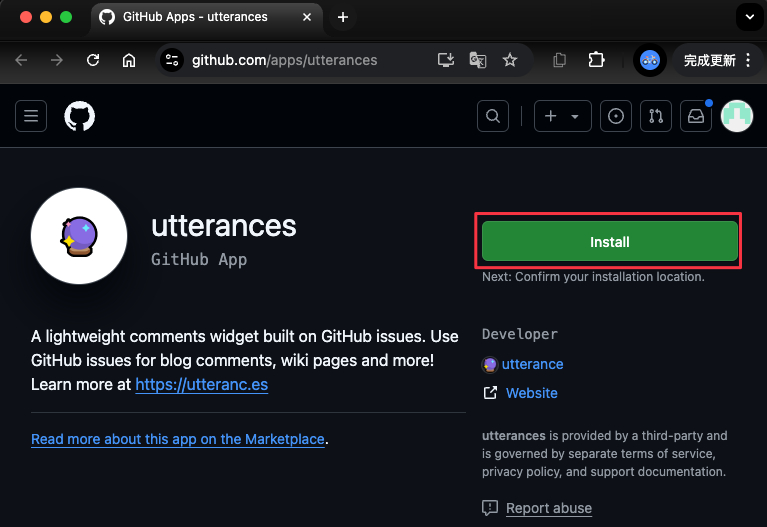
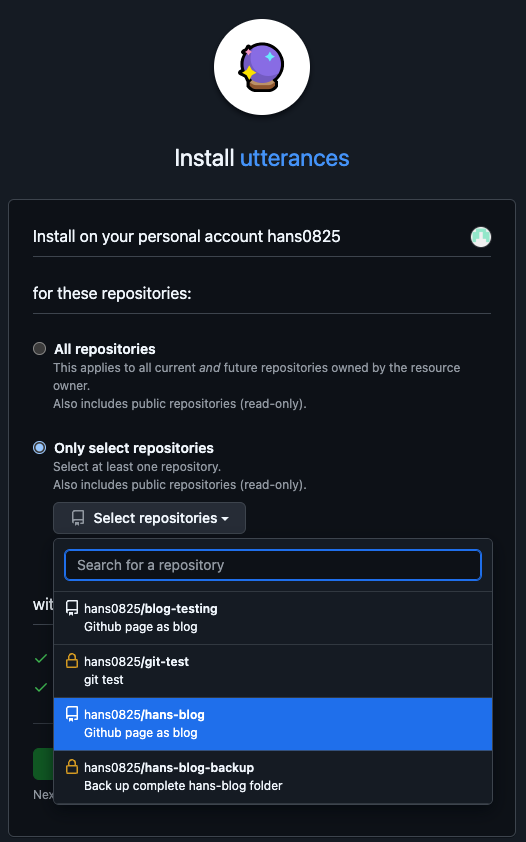
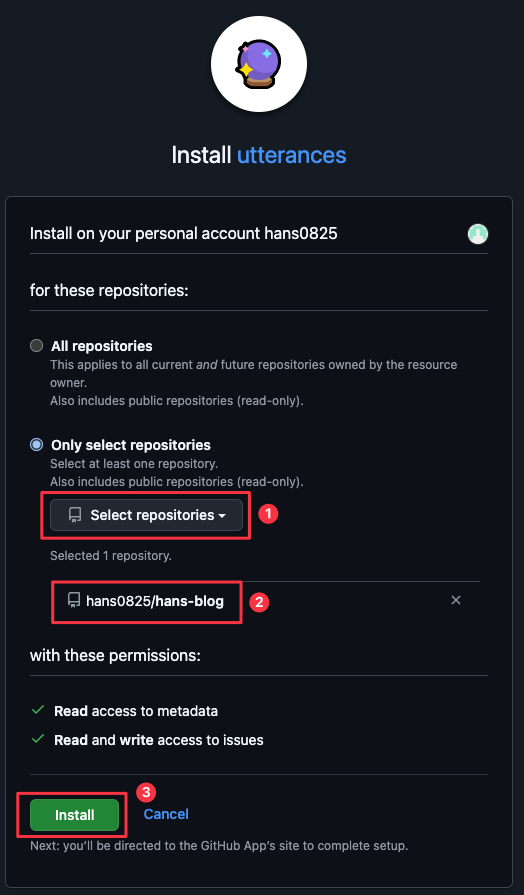
Utterances 安裝 Utterances 評論產生的 issues 可以選擇你想放的 Repository 中,這裡示範將 issues 放在個人網站 Repository。
安裝 Github App utterances
repository 選個人網站的 repository
登入 Github 帳號後即可留言
點選 Sign in with GitHub
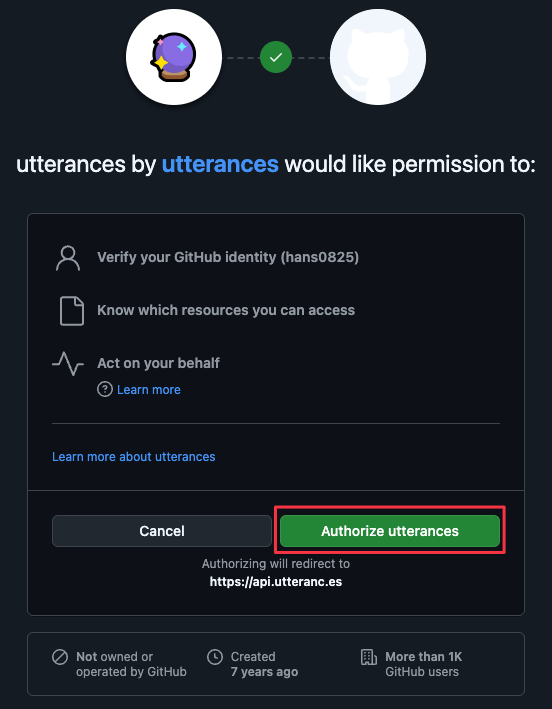
Authorize utterances
留言會上傳到個人網站的 issue 區,別人只要來我的個人網站評論,就是在我的 Github repository 裡面開啟一個 issue。
參考文章
使用 Github page 製作個人網站 – 以 Hexo / Next 製作部落格 | Math.py Hexo-NexT 留言板 utterances 配置 | Moon Jam’s Blog Hexo-NexT 一些好用的酷東東 | Moon Jam’s Blog

